HP Gaming Laptop Mockup 13: Elevate Your Design Presentations
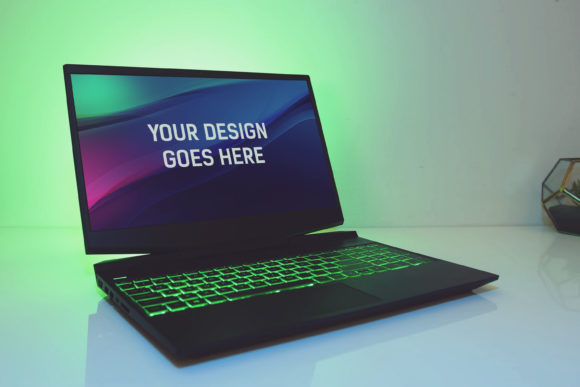
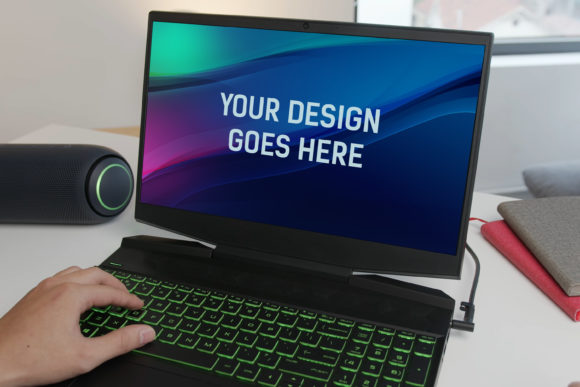
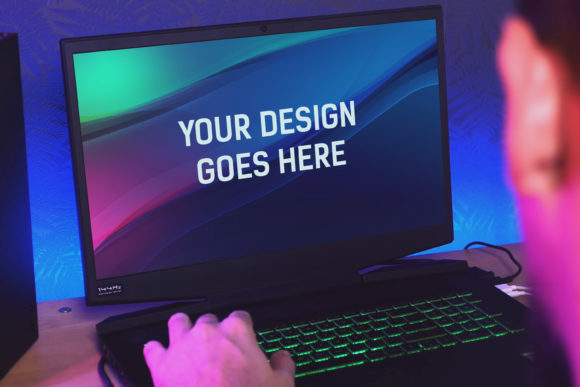
When you need to showcase a UI design, a website concept, or a digital illustration, a static screenshot often falls flat. It lacks context, professionalism, and that tangible sense of “this could be real.” This is where a tool like the HP Gaming Laptop Mockup 13 becomes invaluable. It’s a high-quality, pre-built Photoshop file designed to place your digital artwork onto a photorealistic image of a sleek gaming laptop screen. The promise is compelling: pop in your design, and through the magic of Smart Objects, everything adjusts automatically—perspective, lighting, and screen reflection—to create a stunning, believable presentation image in minutes.
For designers, marketers, freelancers, and entrepreneurs, this kind of asset can transform how clients and stakeholders perceive your work. Yet, the journey from downloading a mockup file to achieving a flawless final result has several subtle pitfalls. Choosing and using a mockup effectively isn't just about clicking “place image”; it’s about understanding the technical underpinnings and the artistic considerations that separate a convincing presentation from a clumsy one.
Overlooking the Foundation: The PSD File Details
Many people rush to download a mockup based solely on the preview image. The visual appeal is paramount, but the technical specs buried in the description are what determine its usability for your specific project. The HP Gaming Laptop Mockup 13 is described as containing a layered and grouped PSD file at 3000x2000px and 300dpi. These aren’t just numbers; they’re critical constraints.
A common mistake is assuming any screen design will fit perfectly. If your design file is 1200px wide at 72dpi, placing it into a 3000px canvas at 300dpi will result in a tiny, pixelated mess. You must check your own design’s dimensions and resolution first. The better approach is to prepare your artwork appropriately. Before using the mockup, resize your design in Photoshop to match or exceed the intended screen area dimensions within the PSD. Work at a high resolution to maintain sharpness when the mockup’s photo filters and effects are applied. This preemptive step ensures your design integrates seamlessly, looking like a native element of the photograph rather than a pasted sticker.
The Smart Object Misunderstanding
The feature “very easy to edit by Smart Object” is the core of this mockup’s automation. However, beginners often confuse convenience with limitation. They double-click the Smart Object, paste their design, and hit save, expecting perfection. What they might miss is the need to align their design within the Smart Object’s canvas. The laptop screen in the mockup has a specific aspect ratio and possibly a slight bezel overlay.
A better technique is to open the Smart Object and create a new layer for your design, rather than replacing the entire background. This allows you to use transform tools to scale and position your work precisely within the screen boundaries shown in the Smart Object file itself. Furthermore, don’t forget to utilize the layers and groups already present. The PSD likely includes layers for screen glare, shadows, or color tint adjustments. Disabling or modifying these can drastically alter the final mood. For instance, a vibrant game UI might benefit from reduced screen glare to keep colors punchy, while a minimalist app design might use the glare to add a realistic touch. Experiment with these layers; they’re provided for control, not just automatic effect.
Filter Application: Enhancing Versus Overpowering
The inclusion of beautiful photo filters is a great bonus, but their application is another area where mistakes happen. Applying a strong, preset filter uniformly can sometimes clash with your design’s own color palette or aesthetic. A dark, cinematic filter might drain the life from a bright, cheerful website mockup.
The corrective advice is to treat these filters as adjustment layers, not final destinations. Use them subtly. Often, it’s more effective to adjust their opacity or blend them with your own color correction layers. The goal is for the filter to enhance the realism of the laptop environment—making the lighting feel consistent—without dominating or distorting the design you’re presenting. Your design should remain the hero, and the mockup the authentic stage.
Choosing the Right Mockup for Your Message
Before even downloading the HP Gaming Laptop Mockup 13, consider if it aligns with your project’s narrative. A gaming laptop mockup inherently communicates power, performance, and a cutting-edge, tech-savvy audience. It’s perfect for showcasing game interfaces, high-performance software, or tech startup websites. However, using it to present a design for a children’s educational app or a serene meditation website might send a conflicting visual message.
A common oversight is selecting a mockup purely for its aesthetic quality without considering contextual relevance. The better choice is to match the device mockup to your target user. If your design is for a broad audience, a neutral laptop might be safer. If it’s specifically for gamers or power users, then the HP Gaming Laptop Mockup 13 is an excellent, resonant choice. Always ask: does this device strengthen my design’s story?
The Final Output: Resolution and Usage
With a final composition at 3000x2000px at 300dpi, your output file will be large and print-ready. This is excellent for high-quality portfolios or printed marketing materials. However, many users then mistakenly try to use this massive file directly for web purposes, leading to slow-loading pages or compressed, blurry images on social media.
Practical advice is to save two versions. Keep your master PSD at full resolution for archival and print needs. Then, for web use, create a downsized version—perhaps 1500px wide at 72dpi—optimized for fast loading. This ensures your presentation looks crisp and professional in every context, from a client’s PDF report to a Twitter post.
Integrating Your Design With Realism
The ultimate goal is realism. A subtle mistake that breaks this illusion is ignoring the screen’s state. Is the laptop “on” in the mockup photo? Often, the screen area in the base photo has a slight glow or ambient light. Placing a pure white, flat design onto it might look unnatural. A better approach is to add a very slight, subtle gradient or noise layer within your Smart Object to mimic the screen’s own light emission, helping your design blend with the photograph’s existing lighting conditions. This attention to detail makes the result convincing.
Using the HP Gaming Laptop Mockup 13 effectively is about respecting its structure as a professional Photoshop tool. It offers automation through Smart Objects to save you time, but it demands your artistic judgment to achieve quality. By preparing your design files correctly, understanding and manipulating the layered PSD, applying effects thoughtfully, and choosing the mockup contextually, you turn a promising digital asset into a powerful presentation tool that elevates your work, communicates your ideas with authority, and impresses your audience with professional polish.